Affiliate links on Android Authority may earn us a commission.Learn more.
ML Kit: Extracting text from images with Google’s Machine Learning SDK
Jun 25, 2025
Machine learning (ML) is quickly becoming an important part of mobile development, but it isn’t theeasiestthing to add to your apps!
To benefit from ML you typically needed a deep understanding of neural networks and data analysis, plus the time and resources required to source enough data, train your ML models, and then optimize those models to run efficiently on mobile.

Increasingly, we’re seeing tools that aim to make ML more accessible, including Google’s new ML Kit. Announced at Google I/O 2018, ML Kit gives you a way to add powerful ML capabilities to your applicationswithouthaving to understand how the underlying algorithm works: just pass some data to the appropriate API, and ML Kit will return a response.
In this tutorial I’ll show you how to use ML Kit’sText Recognition APIto create an Android app that can intelligently gather, process and analyze the information it’s been given. By the end of this article, you’ll have created an app that can take any image, and then extract all the Latin-based text from that image, ready for you to use in your app.
Google’s new machine learning SDK
ML Kit is Google’s attempt to bring machine learning to AndroidandiOS, in an easy-to-use format that doesn’t require any previous knowledge of machine learning.
Under the hood, the ML Kit SDK bundles together a number of Google’s machine learning technologies, such asCloud Visionand TensorFlow, plus APIs and pre-trained models for common mobile use cases, including text recognition, face detection, and barcode scanning.

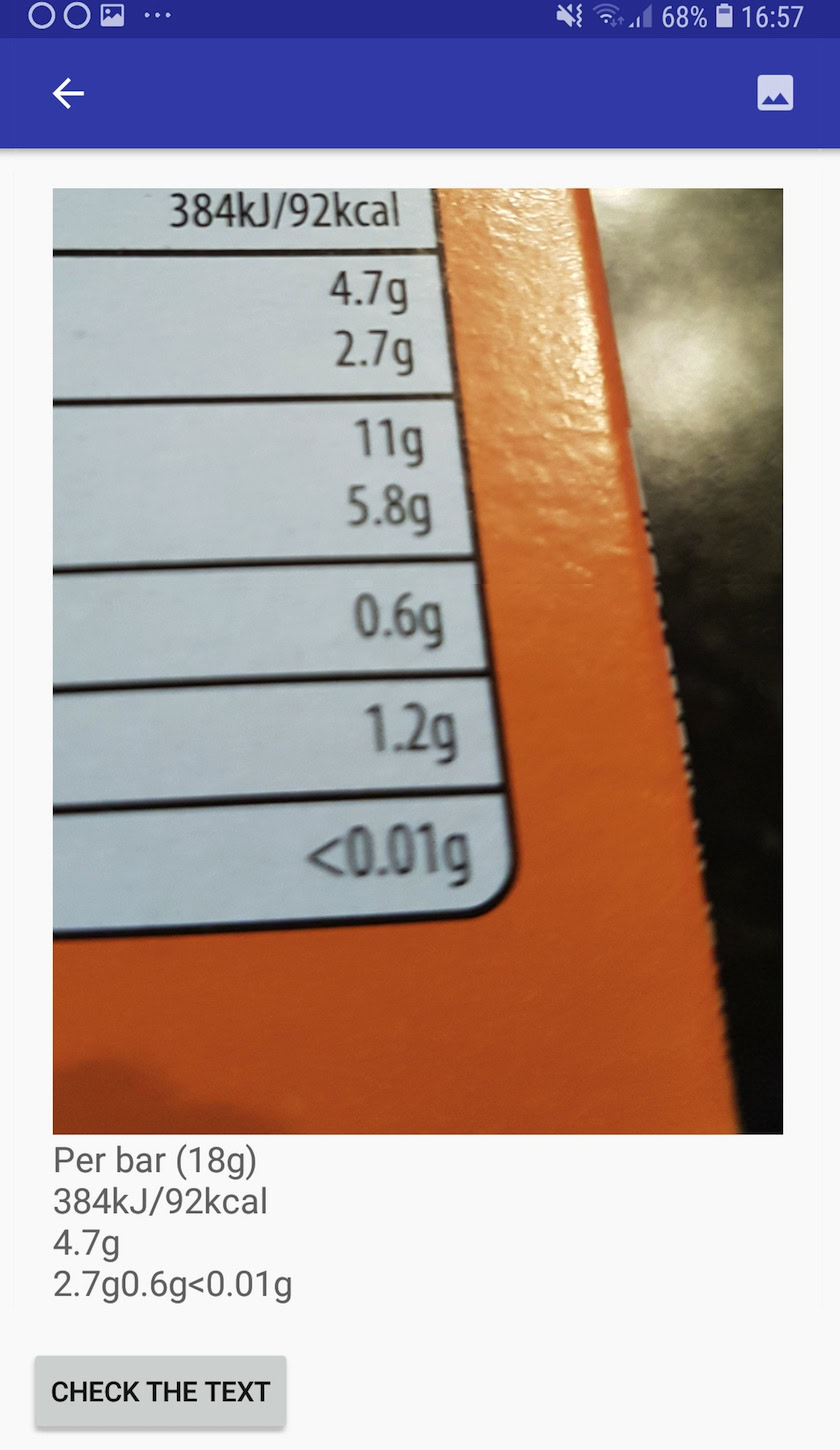
In this article we’ll be exploring the Text Recognition API, which you can use in a wide range of apps. For example, you could create a calorie-counting app where users can take a photo of nutritional labels, and have all the relevant information extracted and logged for them automatically.
You could also use the Text Recognition API as the basis for translation apps, or accessibility services where the user can point their camera at any text they’re struggling with, and have it read aloud to them.

In this tutorial, we’ll lay the foundation for a wide range of innovative features, by creating an app that can extract text from any image in the user’s gallery. Although we won’t be covering it in this tutorial, you could also capture text from the user’s surroundings in real time, by connecting this application to the device’s camera.
On device or in the cloud?
Some of the ML Kit APIs are only available on-device, but a few are available on-device and in the cloud, including the Text Recognition API.
The cloud-based Text API can identify a wider range of languages and characters, and promises greater accuracy than its on-device counterpart. However, itdoesrequire an active Internet connection, and is only available for Blaze-level projects.
In this article, we’ll be running the Text Recognition API locally, so you’re able to follow along regardless of whether you’ve upgraded to Blaze, or you’re on the free Firebase Spark plan.
Creating a text recognition app with ML Kit
Create an application with the settings of your choice, but when prompted select the “Empty Activity” template.
The ML Kit SDK is part of Firebase, so you’ll need to connect your project to Firebase, using its SHA-1 signing certificate. To get your project’s SHA-1:
To connect your project to Firebase:
At this point, you’ll need to run your project so that it can connect to the Firebase servers:
Download Google’s pre-trained machine learning models
By default, ML Kit only downloads models as and when they’re needed, so our app will download the OCR model when the user attempts to extract text for the first time.
This could potentially have a negative impact on the user experience – imagine trying to access a feature, only to discover that the app has to download more resources before it can actually deliver this feature. In the worst case scenario, your app may not even be able to download the resources it needs, when it needs them, for example if the device has no Internet connection.
To make sure this doesn’t happen with our app, I’m going to download the necessary OCR model at install-time, which requires some changes to the Maniest.
While we have the Manifest open, I’m also going to add the WRITE_EXTERNAL_STORAGE permission, which we’ll be using it later in this tutorial.
Building the layout
Let’s get the easy stuff out of the way, and create a layout consisting of:
Here’s the finished activity_main.xml file:
This layout references a “ic_placeholder” drawable, so let’s create this now:
Action bar icons: Launching the Gallery app
Next, I’m going to create an action bar item that’ll launch the user’s gallery, ready for them to select an image.
You define action bar icons inside a menu resource file, which lives inside the “res/menu” directory. If your project doesn’t contain this directory, then you’ll need to create it:
You’re now ready to create the menu resource file:
The menu file references an “action_gallery” string, so open your project’s res/values/strings.xml file and create this resource. While I’m here, I’m also defining the other strings we’ll be using throughout this project.
Next, use the Image Asset Studio to create the action bar’s “ic_gallery” icon:
Handling permission requests and click events
I’m going to perform all the tasks that aren’t directly related to the Text Recognition API in a separate BaseActivity class, including instantiating the menu, handling action bar click events, and requesting access to the device’s storage.
At this point, your project should be complaining that it can’t resolve MyHelper.createTempFile. Let’s implement this now!
Resizing images with createTempFile
Create a new “MyHelper” class. In this class, we’re going to resize the user’s chosen image, ready to be processed by the Text Recognition API.
Set the image to an ImageView
Next, we need to implement onActivityResult() in our MainActivity class, and set the user’s chosen image to our ImageView.
Run this project on a physical Android device or AVD, and give the action bar icon a click. When prompted, grant the WRITE_STORAGE permission and choose an image from the gallery; this image should now be displayed in your app’s UI.
Now we’ve laid the groundwork, we’re ready to start extracting some text!
Teaching an app to recognize text
I want to trigger text recognition in response to a click event, so we need to implement an OnClickListener:
ML Kit can only process images when they’re in the FirebaseVisionImage format, so we need to convert our image into a FirebaseVisionImage object. You can create a FirebaseVisionImage from a Bitmap, media.Image, ByteBuffer, or a byte array. Since we’re working with Bitmaps, we need to call the fromBitmap() utility method of the FirebaseVisionImage class, and pass it our Bitmap.
ML Kit has different detector classes for each of its image recognition operations. For text, we need to use the FirebaseVisionTextDetector class, which performs optical character recognition (OCR) on an image.
We create an instance of FirebaseVisionTextDetector, using getVisionTextDetector:
Next, we need to check the FirebaseVisionImage for text, by calling the detectInImage() method and passing it the FirebaseVisionImage object. We also need to implement onSuccess and onFailure callbacks, plus corresponding listeners so our app gets notified whenever results become available.
If this operation fails, then I’m going to display a toast, but if the operation is a success then I’ll call processExtractedText with the response.
At this point, my text detection code looks like this:
Whenever our app receives an onSuccess notification, we need to parse the results.
A FirebaseVisionText object can contain elements, lines and blocks, where each block typically equates to a single paragraph of text. If FirebaseVisionText returns 0 blocks, then we’ll display the “no_text” string, but if it contains one or more blocks then we’ll display the retrieved text as part of our TextView.
Here’s the completed MainActivity code:
Testing the project
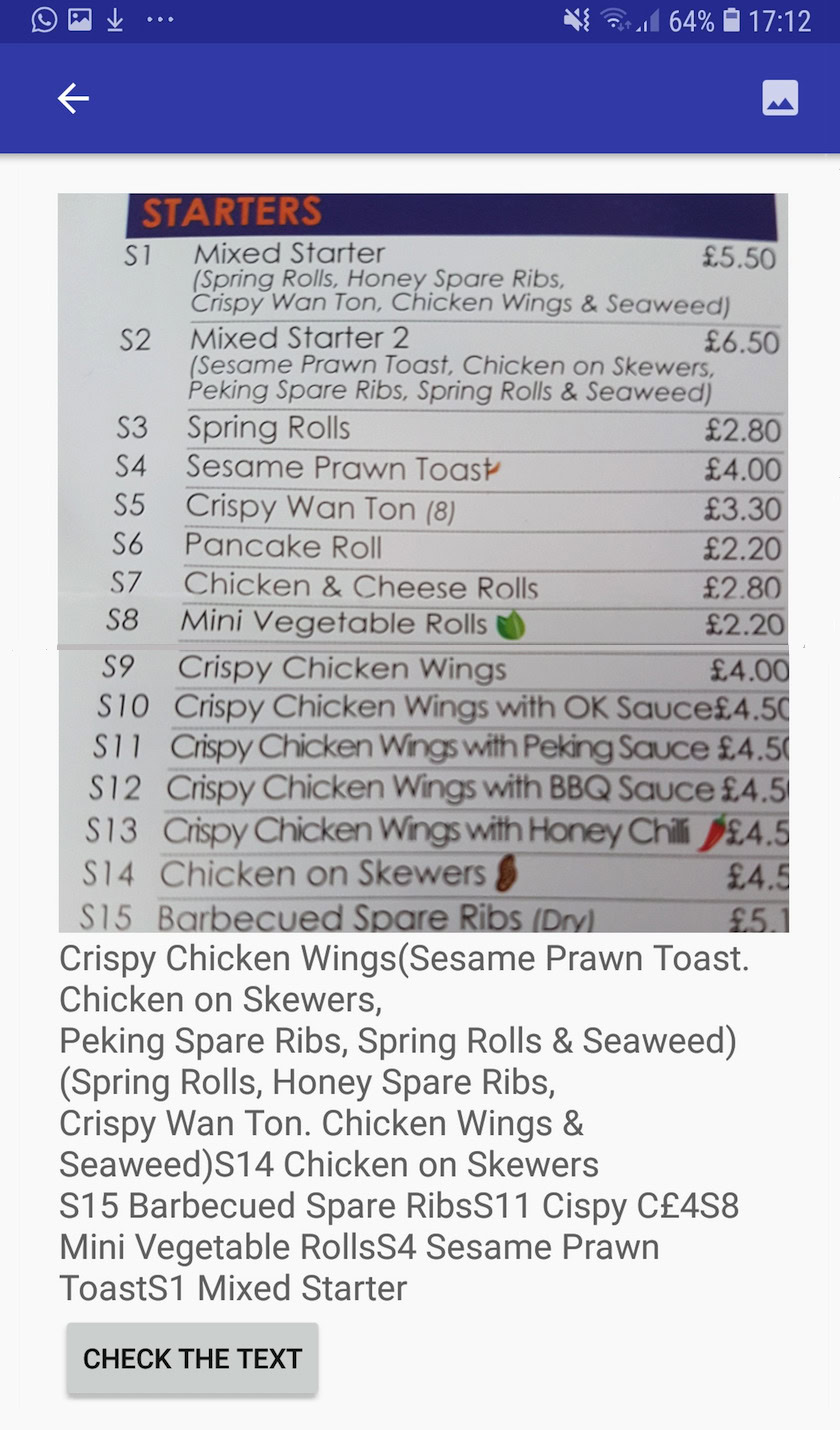
Now it’s time to see ML Kit’s Text Recognition in action! Install this project on an Android device or AVD, choose an image from the gallery, and then give the “Check the text” button a tap. The app should respond by extracting all the text from the image, and then displaying it in a TextView.
Note that depending on the size of your image, and the amount of text it contains, you may need to scroll to see all of the extracted text.
You can alsodownload the completed project from GitHub.
Wrapping up
You now know how to detect and extract text from an image, using ML Kit.
The Text Recognition API is just one part of the ML Kit. This SDK also offers barcode scanning, face detection, image labelling and landmark recognition, with plans to add more APIs for common mobile use cases, including Smart Reply and a high-density face contour API.
Which ML Kit API are you the most interested to try? Let us know in the comments below!
Read More:
Thank you for being part of our community. Read ourComment Policybefore posting.
